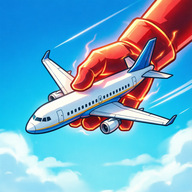
Mastering Air Traffic Control: Essential Catch a Plane Tips and Tricks
Level up your simulation skills with expert Catch a Plane tips and tricks. Learn runway management, airline progression, and collision avoidance strategies.
Mastering the skies requires precision, timing, and a solid strategy, which is why implementing the right Catch a Plane tips and tricks can completely transform your gameplay experience. Whether you are struggling with ground congestion or trying to maximize your airline XP, utilizing proven Catch a Plane tips and tricks will help you keep the tarmac running smoothly and safely. Navigating busy terminals and avoiding catastrophic runway collisions is no easy feat, but with these advanced strategies, you will be managing air traffic like a seasoned professional.
Essential Ground Rules for Collision Avoidance
Managing ground traffic is one of the toughest challenges in any aviation simulation game. According to community reports and player experiences, ground gridlocks happen instantly if you fail to monitor taxiways closely. When multiple aircraft interact on the tarmac, a single stationary vehicle can trigger a chain reaction.
Taxiway and Pushback Management
- The Follow-the-Leader Rule: Planes taxiing in a line will automatically halt if the aircraft directly in front of them stops. If a departing plane is pushing back and initializing its engines, any trailing aircraft will grind to a halt.
- Adjacent Gate Restrictions: Never authorize two planes parked at neighboring gates to push back simultaneously. This common mistake almost always ends in a crash. Player experience dictates that you should wait until the first aircraft has safely taxied away before clearing the next one.
- Buffer for Rejected Takeoffs: To prevent rare but devastating collisions during a rejected takeoff, wait until the preceding aircraft is completely airborne before clearing the next plane to begin its takeoff roll.
| Scenario | Potential Risk | Recommended Action |
|---|---|---|
| Simultaneous Pushback | Wingtip or tail collisions | Wait for one adjacent plane to taxi clear before moving another |
| Trailing Taxiways | Sudden halts and traffic jams | Maintain spacing and monitor engine startup phases |
| Runway Line-Ups | Intersection crashes | Visually verify landing touchdown points before clearance |
Airline Progression and AirMiles Strategies
Purchasing new airline liveries is a major part of expanding your virtual aviation empire. However, progressing efficiently requires understanding how the game's reward systems operate under the hood.
When you buy a new livery, the game awards an initial bonus of 10 AirMiles per movement. Utilizing that specific airline more frequently generates experience points (XP), which ultimately scales up the number of AirMiles you earn per movement over time.
Managing Difficult Airlines
Community reports highlight that certain carriers present unique progression challenges. For instance, Aurigny is widely regarded by players as the hardest airline to level up. This difficulty stems from the fact that Aurigny's fleet consists entirely of ATR 42 aircraft, which primarily spawn at small stands. Furthermore, player experience notes that if you attempt to isolate your game by enabling only Aurigny, other disabled airlines may still accidentally spawn into your rotation.
| Airline | Fleet Characteristics | Primary Spawn Location | Progression Difficulty |
|---|---|---|---|
| Standard Carriers | Mixed aircraft types | Large & Medium Stands | Moderate |
| Regional Carriers (e.g., Aurigny) | ATR 42 turboprops | Small Stands Only | High (Limited spawns) |
| Newly Purchased Liveries | Variable | Dependent on aircraft class | Low (High initial AirMiles bonus) |
To learn more about broader gaming insights and industry standards, check out the Steam Gaming Hub for additional simulation titles and community discussions.
Airport-Specific Navigation Strategies
Every airport in the simulation features a unique layout, creating distinct operational hurdles. Applying tailored Catch a Plane tips and tricks for each specific hub is crucial for maintaining a high safety rating.
Major Airport Layout Breakdowns
- El Dorado International Airport: Featuring two parallel runways, this hub makes simultaneous takeoffs and landings relatively safe and straightforward. However, watch out for potential nose-to-nose collisions between a plane taxiing toward a gate and another heading out to the runway.
- Göteborg Landvetter Airport: Be hyper-vigilant here. Planes taxiing toward a gate and those moving toward the runway can occasionally enter the exact same taxiway simultaneously, resulting in a head-on collision.
- London Gatwick Airport: The left section of this airport poses a notorious bottleneck. Aircraft heading to the left-side gates share a taxiway with planes departing those same gates for the runway. Community reports advise holding incoming gate traffic until pushing aircraft clear the area completely.
- Ottawa Macdonald–Cartier International Airport: This hub separates operations efficiently: Runway 14/32 handles departures, while Runway 07/25 manages arrivals. Because of this, you can safely land and launch medium-class planes simultaneously. Just remember to clear the entire runway when a heavy aircraft is departing.
| Airport Name | Primary Layout Feature | Major Hazard to Watch | Recommended Countermeasure |
|---|---|---|---|
| El Dorado Int. | Dual parallel runways | Runway/taxiway intersection blockages | Monitor taxi speeds closely |
| London Gatwick | Shared left-side taxiways | Nose-to-nose gate conflicts | Hold incoming gate traffic until pushback clears |
| Ottawa Macdonald–Cartier | Separated arrivals/departures | Heavy aircraft wake and intersection overlap | Clear full runway during heavy departures |
| Sangster / Montego Bay | Stands 8 through 19 congestion | Pushback and taxi path overlaps | Verify stand clearance before moving traffic |
Advanced Runway Safety and Line-Up Tactics
Knowing when to clear a plane for takeoff versus using the line-up button can make or break your shift. At airports like Innsbruck Airport, mastering the use of the line-up command is essential because runway retracing often leads to inbound aircraft touching down just as a plane begins its takeoff roll.
Small and Medium Aircraft Optimization
At facilities like Rhodes International Airport, controllers have more flexibility. Player experience confirms that medium and small planes can safely line up while another aircraft is actively landing, maximizing your hourly movement rate without risking safety infractions. Always double-check visual touchdown zones to ensure your runway incursions remain entirely safe.
| Aircraft Class | Safe to Line Up During Landing? | Special Conditions |
|---|---|---|
| Small Planes (e.g., ATR series) | Yes (at designated airports) | Must visually verify touchdown safety |
| Medium Jets | Yes (at select hubs like Rhodes & Ottawa) | Avoid if intersecting heavy runways |
| Heavy Aircraft | No | Requires completely clear runway zones |
Frequently Asked Questions
What are the best Catch a Plane tips and tricks for avoiding ground crashes?
The most reliable Catch a Plane tips and tricks for preventing ground accidents involve never authorizing pushbacks for adjacent gates simultaneously and always monitoring shared taxiways for oncoming traffic before granting movement clearance.
How do I maximize my AirMiles earnings quickly?
To boost your AirMiles, purchase new airline liveries to secure a 10 AirMiles-per-movement baseline, then consistently fly those specific airlines to increase their individual XP levels over time.
Why do planes suddenly stop while taxiing?
Planes will automatically halt if the aircraft directly ahead of them stops. This frequently happens when a nearby plane begins its pushback sequence and initializes its engines, triggering a safety pause for any trailing traffic.
Related Guides
Catch a Plane how to fly max distance: The Ultimate Flightline Strategy Guide
Master the art of long-haul aviation in Roblox Flightline. Learn how to catch a plane, how to fly max distance, and perfect your takeoffs and landings.
Catch a Plane How to Play: Ultimate Beginner's Guide for Roblox
Learn Catch a Plane how to play with this ultimate Roblox guide. Discover training tips, glove upgrades, gear boxes, and strategies to soar high.
Catch a Plane How to Time Jumps: Ultimate Runway Launch Strategy Guide
Master Catch a Plane how to time jumps effectively. Learn runway mechanics, grip training, and gear upgrades to soar across the sky in Roblox.
Catch a Plane: How to Catch Planes and Dominate the Ultimate Roblox Simulator
Master the art of how to catch planes in the viral Roblox simulator. Learn pro training strategies, gear upgrades, and how to reach the finish line fast.